Why Most Soil Advice Fails in New England
I have watched homeowners spend hundreds of dollars on bagged compost, gypsum, and "clay breaker" products before they ever put a shovel in the ground and looked at what they were working with. I understand the impulse. When a garden fails, the soil is the easiest thing to blame, and the garden center shelf offers a solution for every problem. The problem is that most of those solutions are answers to questions nobody asked first.
New England soil is not uniformly bad. It is variable. Drive 20 miles inland from the coast and the texture shifts. Dig in a backyard that was once farmland and you'll find something entirely different from a suburban lot scraped bare by developers in the 1980s. I have found beautiful sandy loam in a community garden plot in Somerville and dense, gray clay 200 feet away that had never been amended in its life.
Before you spend a dollar on soil amendments, you need to know which soil you have. The jar test tells you.

How to Do a Jar Test — Step by Step
I learned this method in a soil science lab at UMass Amherst, and I have been using it ever since. It requires no special equipment, no chemistry knowledge, and no calibration. It is not perfectly precise — but it is precise enough to tell you whether your drainage problem is real, whether your soil actually holds nutrients, and whether adding yet another bag of compost will help or just create a new problem.
What You Need
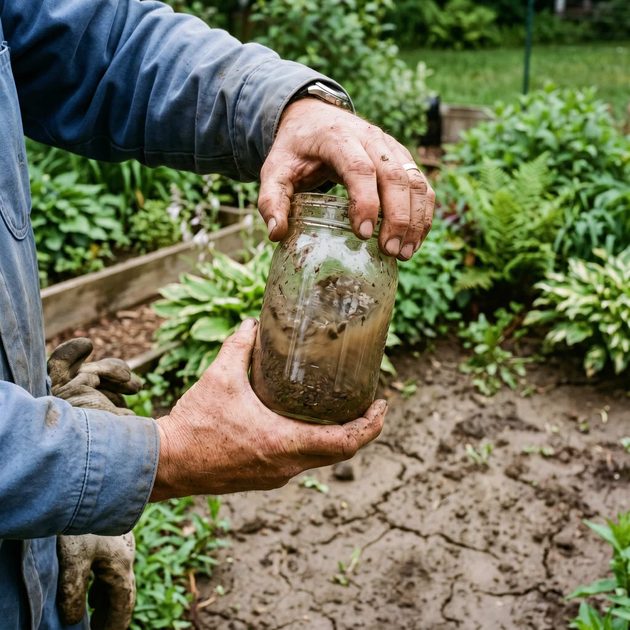
A straight-sided clear glass jar with a lid — a quart mason jar is ideal. A trowel. Water. A few drops of liquid dish soap. A ruler. That's it.
The Steps
Dig down six inches in the bed you want to test. Take your sample from that depth, not from the surface. Surface soil is often amended, mulched, or disturbed. You want the soil your plants' roots will actually encounter. Remove any large stones, roots, or worms. Fill the jar about one-third full with your soil sample. Add water until the jar is three-quarters full, then add a drop or two of dish soap. The soap acts as a surfactant — it helps separate the soil particles. Cap the jar tightly. Shake it hard for two full minutes. You want every aggregate broken apart and every particle suspended in the water. Set the jar on a level surface where it will not be disturbed. Now wait.
How to Read the Layers
Sand settles first. Within one minute, you'll see the coarse grains hit the bottom. Silt settles next, over the course of several hours. Clay stays suspended the longest — in our New England soils, it can take 48 hours or more for the water to clear completely. What you're left with is a visual record of your soil's texture. Measure the total height of all settled soil. Then measure each layer individually. Divide the sand layer height by the total height. That's your sand percentage. Do the same for silt and clay. The three numbers should add up to roughly 100 percent.

What Your Results Actually Mean
I have done this test in over a dozen different beds around Boston. Here is what I've learned to look for.
If your jar shows 20 percent or more clay, you have heavy soil. That's common in our region. It means your soil holds water and nutrients well, but it drains slowly and compacts easily. You do not need gypsum — that's a myth for most New England clays, which are not sodic. You need organic matter worked into the top six inches, and you need to stay off the soil when it's wet.
If your jar shows sand above 60 percent, you have fast drainage and low nutrient retention. This is less common in New England unless you're on an old glacial outwash plain. Your soil will warm up fast in spring but dry out quickly in summer. You need compost for water retention, and you'll need to fertilize more carefully because nutrients will leach out.
The ideal texture for most garden plants is loam — roughly 40 percent sand, 40 percent silt, and 20 percent clay. I have almost never found that naturally in a New England backyard. That's fine. You don't need perfect loam. You need to know what you have so you can work with it instead of against it.
I once tested soil from a raised bed I'd built three years earlier. I thought I'd filled it with a good mix. The jar told me otherwise: 50 percent clay, because I'd set the bed directly on native soil without a barrier, and worms had been mixing the two layers the whole time. That's why my root vegetables were stunted. The fix was not more compost on top. The fix was lifting the bed, laying down a separation layer, and refilling with a mix that matched what I was actually trying to grow.
That is what a jar test gives you: the truth. Not a guess, not a product recommendation, not advice written for a garden in another climate. Just your soil, in a jar, telling you exactly what it is.